In the contact sheet, you can view the profile, assignments, unavailabilities, meals, material items and messages of a contact. Double-click a contact in your list to open the detailed contact sheet and access all the features.
Profile
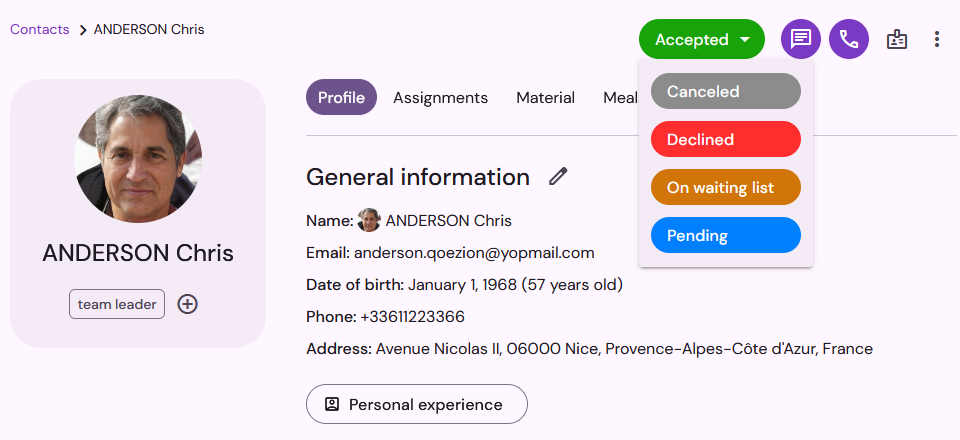
In the Profile section, you can consult all the information about a contact.
The Application Status field allows you to accept, reject, decline or put on waiting list each application. When the application status changes, the applicant is notified by email as well as in his or her personal space.
Tags allow you to associate keywords with a profile, for example to easily search in your contact list later. Click the + button to add or remove tags.

You can also consult his or her Personal experience: teammates can describe their experience in events, and you will find the list of events they have participated in by applying with Qoezion.
The contact sheet is divided into several sections: general and additional information, settings, etc. To edit the information in a section, click on the Edit icon in the upper right corner of each section. To change the order of sections and fields in the contact sheet, go to Settings > Contact information
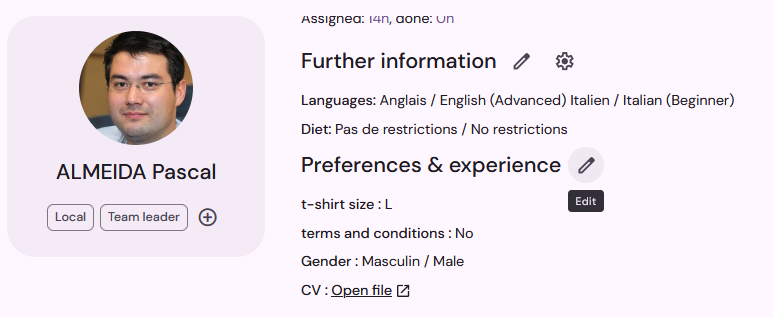
General Information and Further Information sections contain fields that cannot be deleted: first name/last name, photo, languages, skills, etc. After those sections, you will find the sections you have created, with your own customized information fields.
The Organization section contains internal information, which is entered directly by the organizer and is not visible to teammates. To create and modify organization fields, go to your organization space. In this section, you will also find a list of other events in your organization for which the contact has also applied.

Settings: in this section you can define the authorized activities, access group and the accreditation areas of a teammate. The Accreditation areas field allows you to adjust the authorized and forbidden areas for each teammate. By default, the accreditation areas are automatically inherited from the activities to which the teammate is assigned.
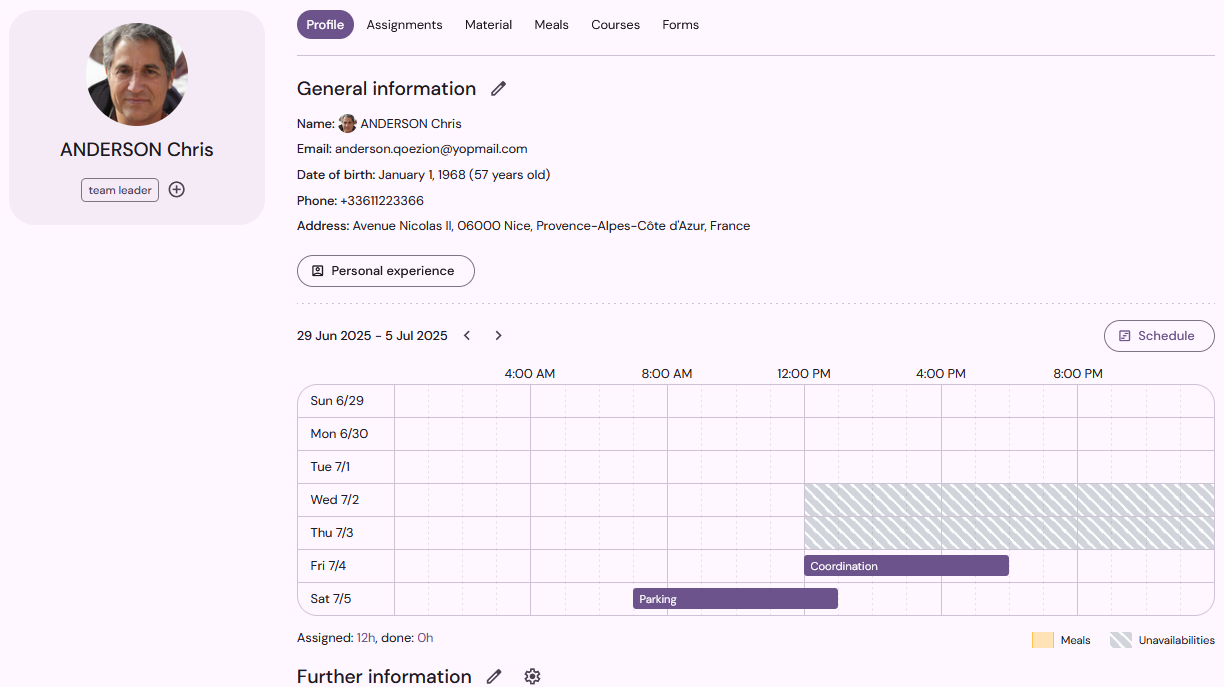
Schedule overview
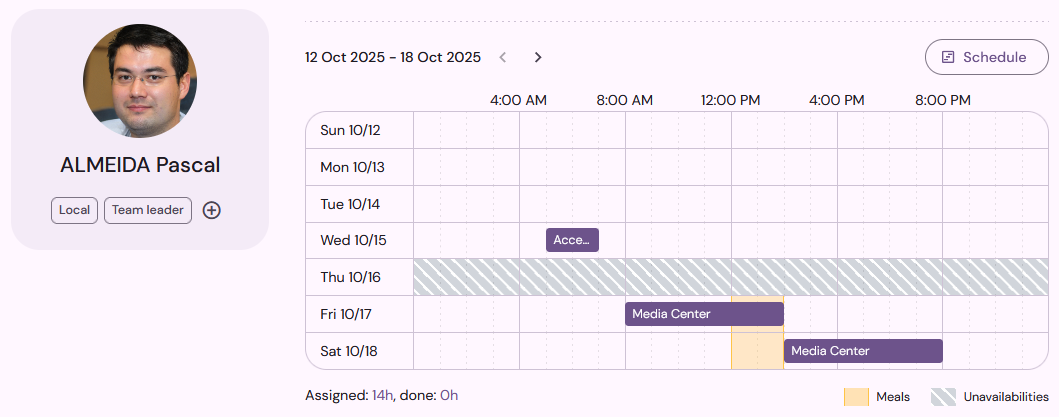
In the contact sheet, you will find an overview of the teammate's schedule, including their assignments, unavailability (grayed-out time slots), and meals (time slots in yellow). You cannot make changes to this overview, but by clicking on the Schedule button, you will be redirected to the planning view, where you can modify the teammate's availability or delete assignments.
Assignments
In the Assignments section you have access to the list of shifts to which the teammate is assigned. You can sort the list by clicking on the column titles or filter it using the filters available at the top of the list.
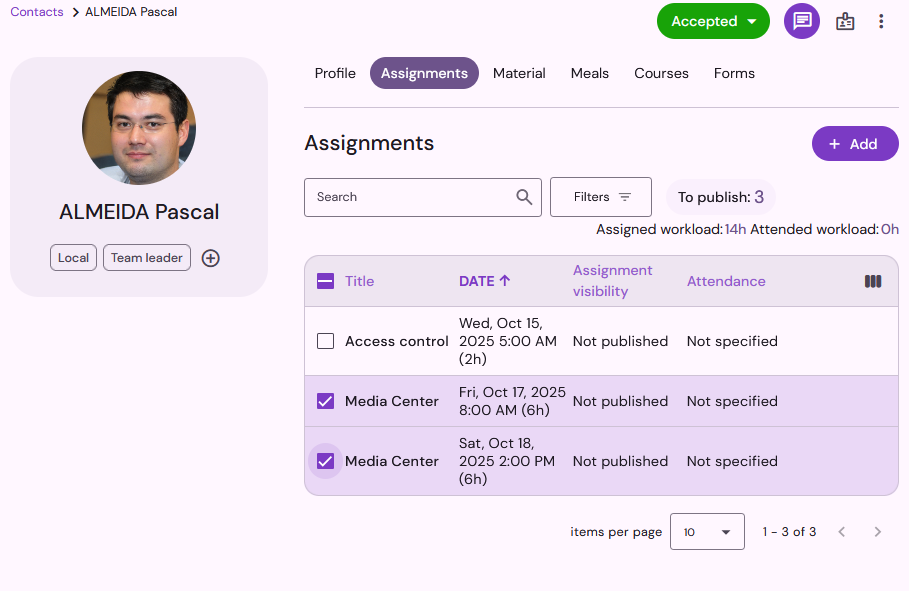
When you select one or more shifts, a toolbar is displayed at the bottom of the page, allowing you to publish them, inform the attendance status, or delete the shifts.
The Add button at the top of the page allows you to create new assignments for your teammate. The list of available shifts depends on the authorized activities and the availability and skills of the teammate.
For more information, see the article Assignments.
Material items
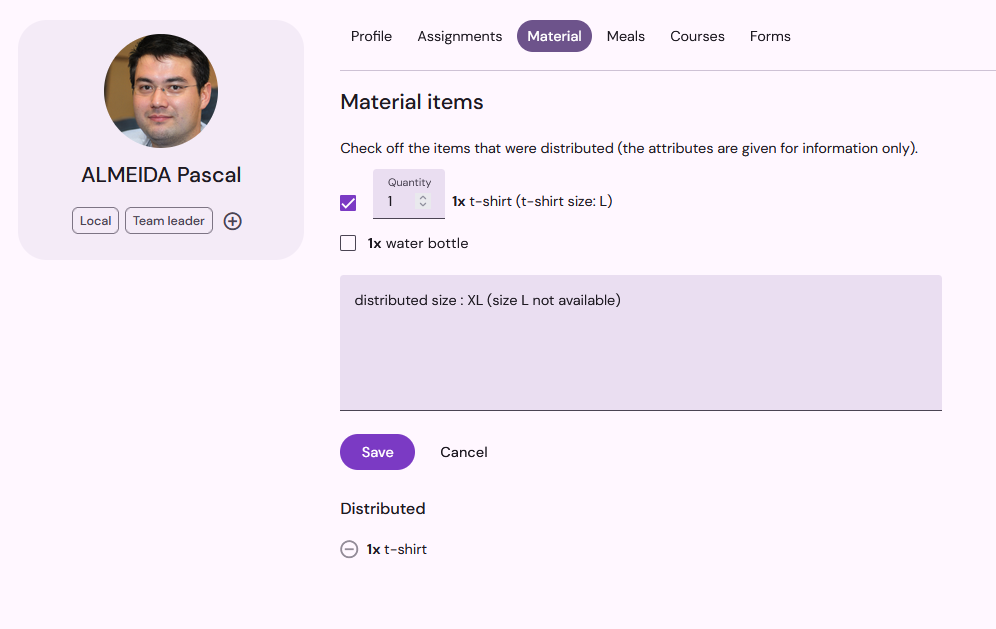
In the Materials section, you will find the list of items the teammate is entitled to, according to the eligibility rules that you have defined.
Tick one or more items to indicate that they have been distributed (you can change the quantity if they are partially distributed). To cancel a distribution and return to the "not distributed" state, click on the "minus" icon in the list of distributed items.
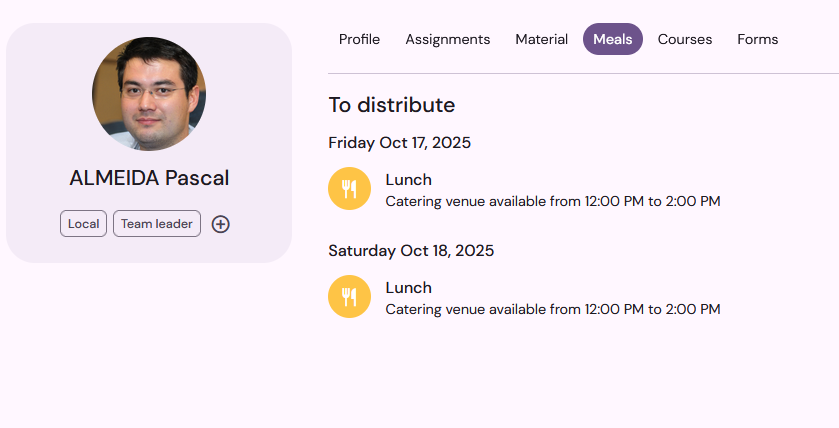
Meals
In the Meals section, you will find the list of meals the teammate is entitled to, according to the eligibility rules you have specified in the Catering management tool. You can track the distribution status of meals by indicating them as distributed or not.