
You can access your contact list hrough the Contacts menu at the top of the page. Contacts include everyone who has applied to your event, regardless of the status of the application. You can change the status of an application at any time in the contact's profile page or use bulk update to change the status of multiple applications at once.
Two display modes are available : the list view and the planning view
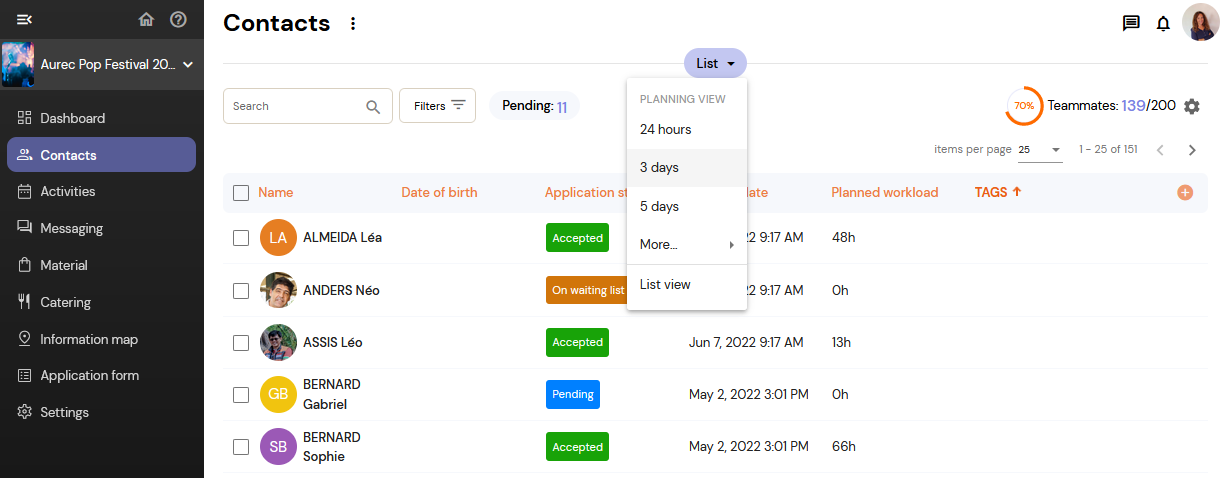
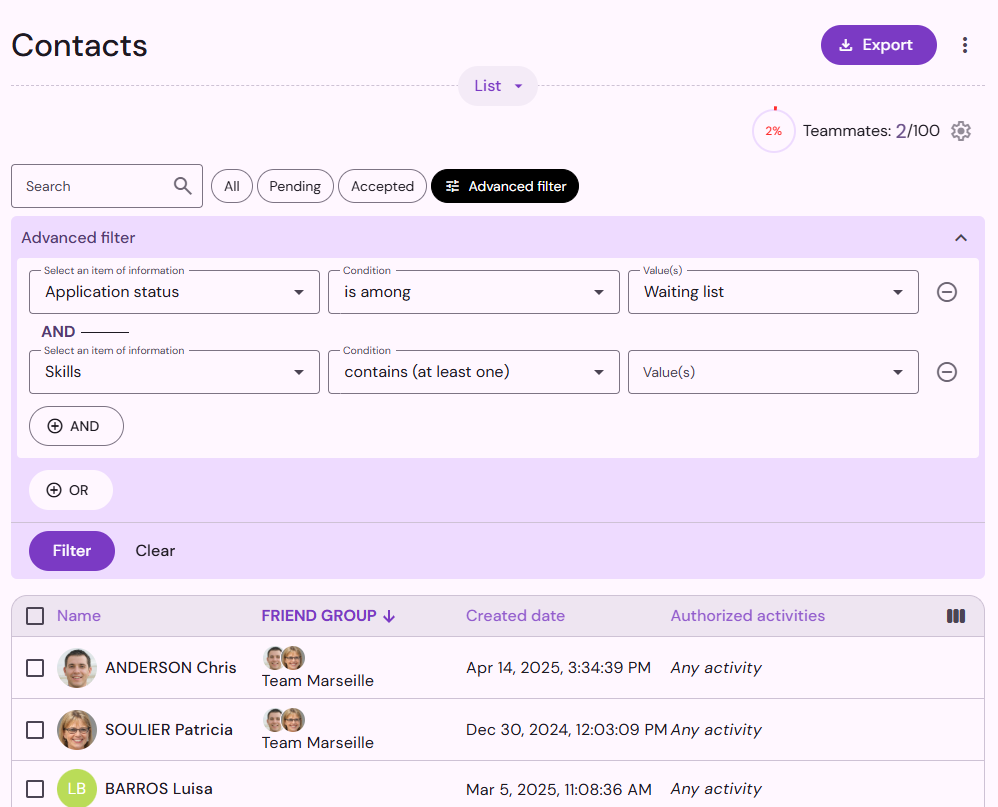
List view
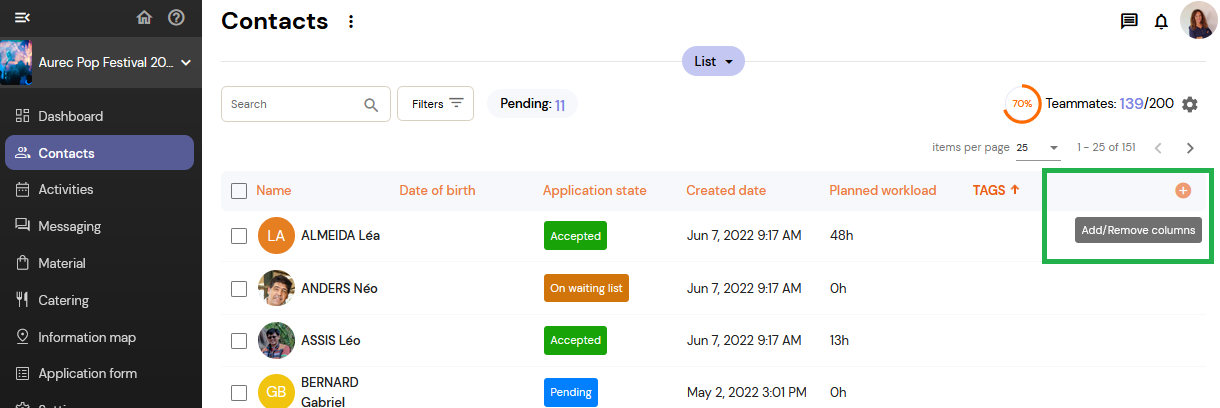
The list view allows you to choose the columns you want to display and sort them according to your needs.
Sort: Click on the column titles to sort them alphabetically, from newest to oldest, etc.
Show/Hide Columns: Click on the Add/Remove Columns icon (in the upper right corner of the list) to choose to show or hide columns. Please note that depending on the width of your screen, some columns may not be visible.

Planning view
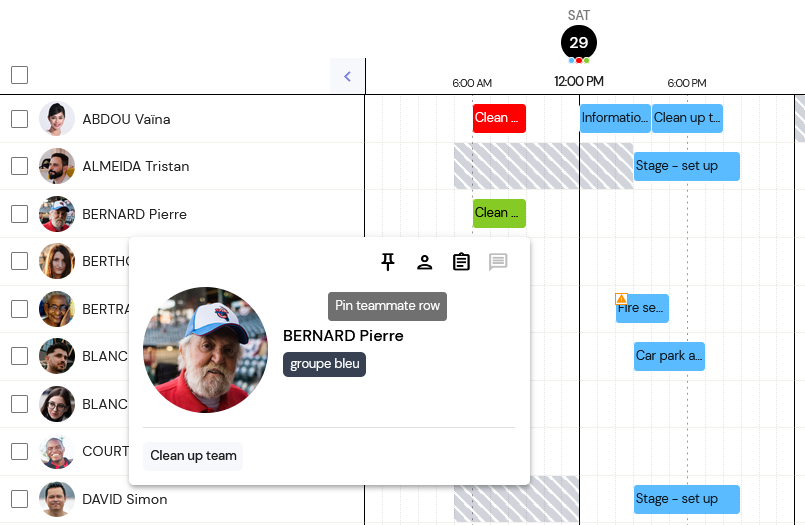
The planning view allows you to view the assignments and unavailabilities of your teammates on a timeline. You can choose the level of zoom that you wish to display: 12 hours, 1 day, 3 days, etc. A color code informs you at a glance about the status of attendance of each teammate:
green : present
red : absent
blue : attendance status not specified
hatched gray : unavailable

When you hover over a teammate, you have access to additional information and you can pin the row by clicking on the pin icon, so that the teammate row is always visible at the top when you scroll down the list. This way, you can compare different schedules and easily make the necessary changes. You can pin multiple items at once, and to unpin them simply click the pin icon again.
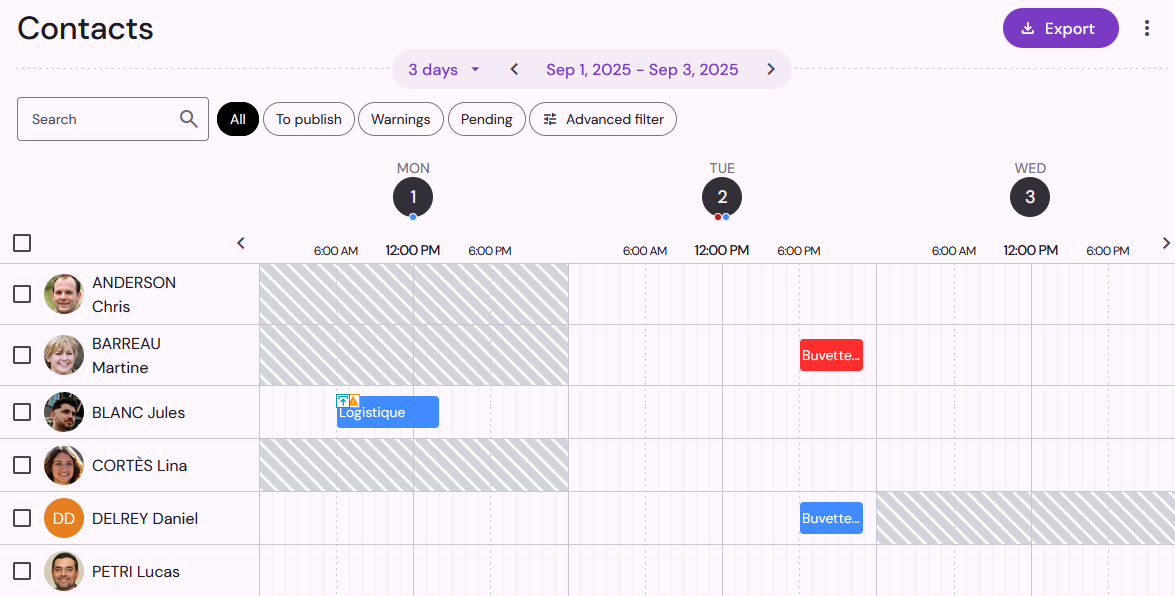
Check contact's availability
In the planning view of the contact list, periods marked as unavailable (i.e., slots that the contact did not tick in the registration form) will be identified by gray-shaded areas on the schedule. Periods marked as available (slots ticked by the contact in the form) are free, with no markings.
Please note that periods that have not been requested in the form are also free, with no markings. The contact is only considered unavailable when they have expressly indicated this via the registration form.
You can update a contact's availability at any time from the contact list (planning view).
Update availabilities / unavailabilities
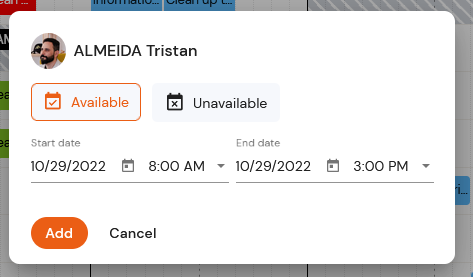
From the planning view, you can easily update the availability / unavailability of your teammates. To add a period of unavailability, draw on the schedule the time slot on which the teammate is not available and click on Add.
It is the same if you need to delete an unavailability slot and indicate that the teammate is available: draw the time slot on the schedule (over the periods of unavailability, indicated in hatched grey) and add an availability instead.
Filters and Search
Whether in list or planning view, use filters or the Search field to quickly find your contacts. For example, you can filter your contacts by application status, by tags, by contacts with unread messages, or any other desired field.
You can combine several search criteria, using AND / OR operators and a variety of conditions: “is equal to”, “is greater than”, “contains”, and many more.
To reset all filters, click on Clear.
QR code search
The QR code search allows you to quickly access the information of a contact on your list. This feature is especially useful to welcome your teammates at the volunteer center, during a meeting, etc. Click on Scan QR code to search for a teammate using the QR code they can display from their personal space. Place the QR code of the teammate in front of your camera; as soon as a valid QR code is detected the contact page is immediately displayed.
You must authorize Qoezion to access your camera to be able to scan QR codes.

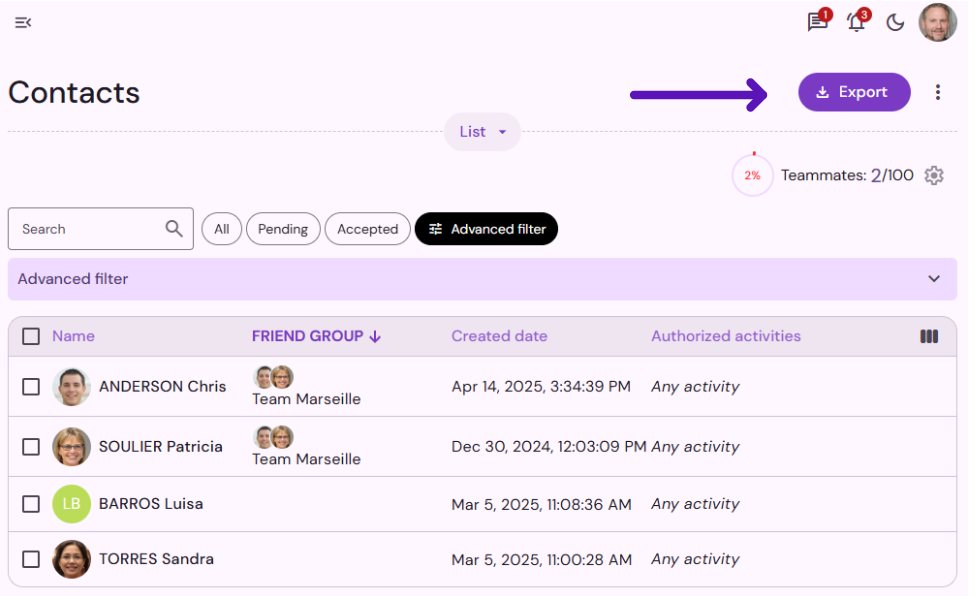
Export
Qoezion allows you to export your contacts in an Excel file or in Vcards format. To do so, select the desired contacts and click on Download, then choose the export format.
The Days of presence export provides the list of your contacts with their days of attendance in your event (the days they have at least one assignment).
The Individual schedules export provides the schedules of each teammate in pdf format (one page per teammate).

Bulk update
From your contact list you can easily make bulk updates: select the contacts you want to update and click on the Bulk update button in the menu at the bottom of the page. You can then choose the fields to be updated and specify their values.

You can update tags (to add or remove tags from multiple contact records at once), application status, authorized activities, accreditation areas, or any custom profile fields you have created in your application form.

Combined with filters, this feature allows you to quickly process a large amount of data. For example, you can accept all pending applications, add a particular tag to all teammates assigned to a specific activity, and much more!
Grouped Assignment
In your contact list, you can select several teammates and assign them together to the same shifts. This way you can create a team that will work together on several shifts, or manage the case of people who want to participate together in the event (members of the same family, the same sports club, etc.)
Select the teammates in the contact list, then click on Assign at the bottom of the page (three vertical dots icon). Qoezion will list only the shifts available for all the selected teammates .

Delete a contact
To delete a contact, use the list view and click on the additional menu (3 vertical dots icon), then click on delete.
Please note that all deletions are irreversible.
